Okay, here’s my attempt at a blog post about Chandler Hollow’s eyebrows, written in the style of a mature, down-to-earth blogger who loves sharing their practical experiences:
Alright, so I’ve been getting tons of questions about how I finally nailed the Chandler Hollow eyebrow look. It’s been a journey, let me tell you! I didn’t just wake up with these brows, haha. It took some experimenting, but I’m finally happy with them and ready to spill the beans.
Starting Point: What I Was Working With
First, let’s talk about where I started. My natural brows are… well, they’re there. Not super thick, not super thin, kinda just… average. They definitely didn’t have that defined, slightly arched shape that Chandler rocks. I tried to take pictures, but it is difficult. They’re sparse in some areas and a bit unruly in others. Basically, a blank canvas that needed some serious help.
The Experimentation Phase: Hits and Misses
I dove headfirst into the world of brow tutorials. Oh boy, were there some disasters!
- First Attempt: The Overly-Filled Brow. I went way too heavy with the brow pencil. I ended up looking like I had two caterpillars glued to my forehead. Big mistake. Learned quickly to use a lighter hand.
- Second Attempt: The Wrong Shade. I grabbed a pencil that was way too dark for my hair color. It looked super unnatural and harsh. Note to self: matching your brow product to your hair (or slightly darker) is KEY.
- Third Attempt: Sharpie brows I don’t konw why I used sharpie to try. It is very silly and stupid. Please do not try to use it.
- Fourth Attempt: The “Almost There” Brow. I started to get the hang of it. I used a lighter, ashier-toned pencil and focused on creating small, hair-like strokes. It was better, but still not quite there.
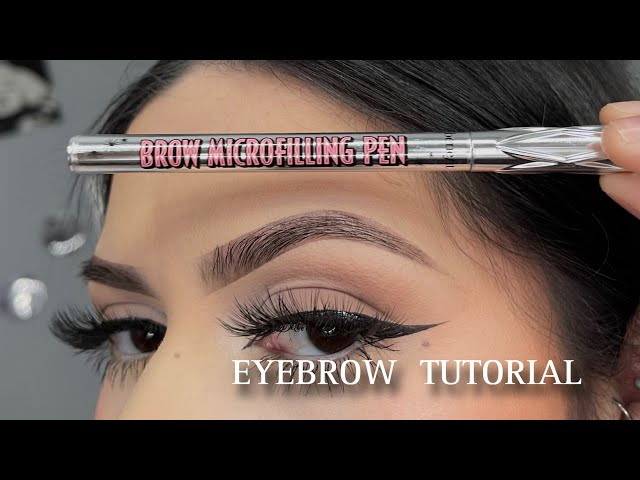
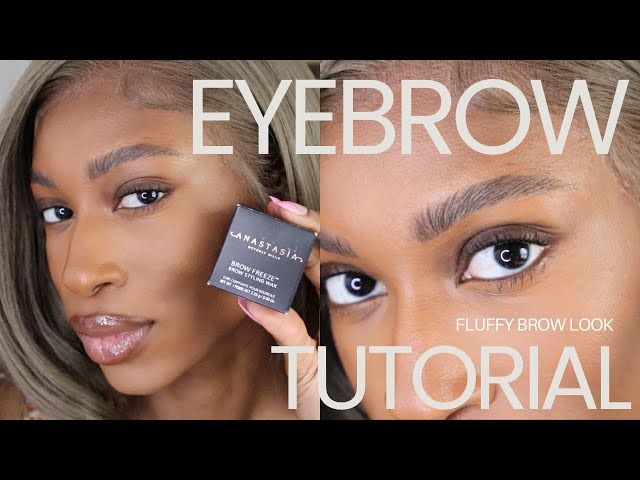
The Breakthrough: Finding the Right Technique & Products
Finally, after weeks of trial and error, I figured out what worked for me. It’s all about a combination of the right products and a specific technique. Here’s the breakdown:
- Shaping.I start by brushing my brow hair with my hand, getting a sense of where the natural arch should be.
- Light Strokes. This is the most important part! I use a very fine-tipped brow pencil (I’ve been loving the brow pencil, but any good quality, fine-tipped pencil will do). Instead of drawing solid lines, I create tiny, feathery strokes that mimic real hairs. I focus on filling in the sparse areas and slightly extending the tail of my brow.
- Building Gradually. I don’t try to achieve the perfect brow in one go. I build up the color and shape gradually, stepping back from the mirror frequently to check the overall look. Less is more, people!
- Set It.I take a photo to find where I did well.
My Final Thoughts (and Encouragement!)
Getting the Chandler Hollow eyebrow look isn’t about perfectly copying someone else’s brows. It’s about finding what works for your face shape and natural brow structure. It’s about enhancing what you’ve already got! Don’t be afraid to experiment, and don’t get discouraged if you don’t nail it on the first try. It takes practice! Just keep at it, and you’ll find your perfect brow routine.
And remember, brows are sisters, not twins! They don’t have to be perfectly identical. A little bit of asymmetry is natural and beautiful.


