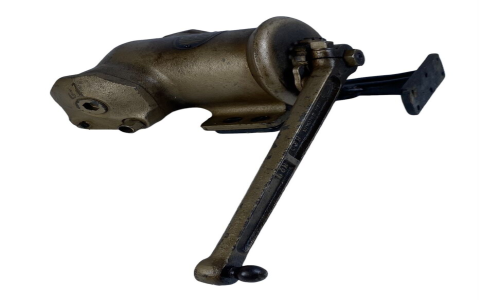
Okay, so the other day, I finally got around to fixing that annoying door in my workshop. You know, the one that slams shut like a jail cell? I decided to install a Corbin door closer, and let me tell you, it wasn’t as straightforward as I thought it would be.
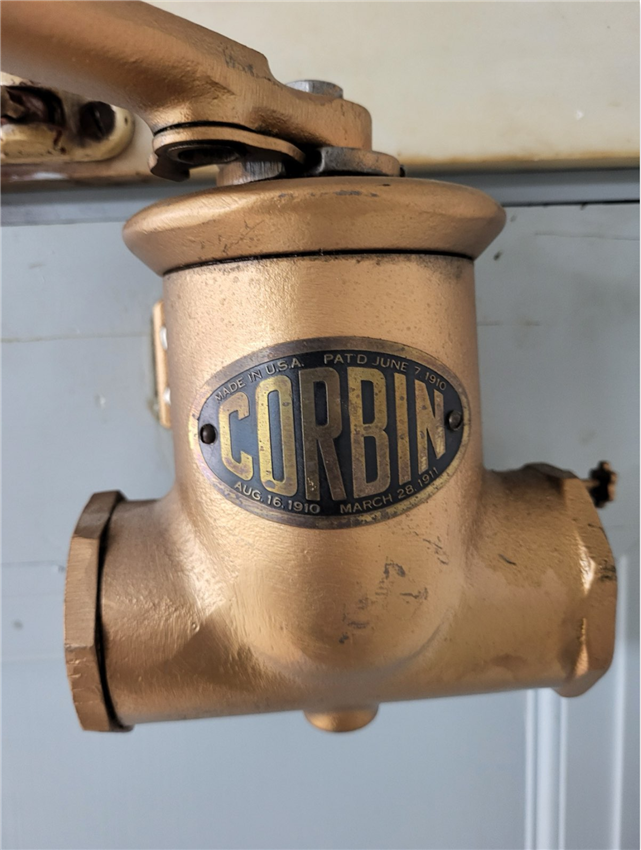
First, I unpacked the whole thing. Inside were a bunch of parts – the closer body, the arm, some screws, and a template. The template, that’s key, by the way.
Getting Started
- I taped that template onto the door and door frame, exactly where the instructions showed. I double, triple-checked the measurements,because I have a knack for misreading things.
- Then, using the template as my guide, I grabbed my drill and started making pilot holes for the mounting screws.
Mounting the Closer
This is where I got a little sweaty. I held the closer body against the door, lining it up with those pilot holes, and started screwing it in. The screws were surprisingly long, so it took a bit of effort. Once the body was secure, I did the same thing with the arm bracket on the door frame.
Connecting the Arm
Here’s where it gets a bit fiddly. I had to adjust the arm length, there are these little screws to loosen and tighten to get it just right. I connected the arm to the closer body and the bracket, making sure everything was aligned. It took a few tries to get the tension right. I opened and closed the door like 10 times to test it. I found at first, it was either too stiff or still slammed a bit.
Final Adjustments
After some more fiddling with the adjustment screws on the closer body, I got it to close smoothly and latch securely. No more slamming! I am pretty happy with myself and glad I finally did it. It’s a small thing, but it makes a big difference. Now I can go in and out of the workshop without worrying about waking up the whole neighborhood!


